getRealism
Want to create realism in art? You've come to the right place.
Shading A Drawing
- Transitioning from line drawing to shading
- Placing lighter shapes next to darker shapes
- The light side
- The shadow side
- And more
Drawing And Shading For Realism
Understanding Light and Shadow
- Importance of transitioning from line drawing to shading
- Objective of placing lighter shapes next to darker shapes
- Understanding Light and Shadow
- Light side
- Shadow side
- Practical Exercises
- Starting with simple objects like a pear
- Observing light and shadow
- Identifying light side, shadow side, and cast shadow
- Step-by-step sketching process
- 1. Sketching overall shape
- Lightly sketching shadow side
- Adding cast shadow
- Recognizing Shadow Shapes
- Definition of "shadow shapes"
- Variation in shadow shapes with complex objects
- Intricacies within shadow shapes
- Creating a gradient effect in shadows
- Techniques for Observing and Drawing
- Importance of drawing slowly and focusing
- Relaxing the eyes and gaze
- Recommended observation technique
- Gazing at the object for 13 seconds
- Noticing details as you count
- Replicating Observations
- Copying shadow shapes as a method of accuracy
- Observational practice leading to increased detail recognition
- The Role of Paper in Shading
- Paper as the light area
- Importance of preserving white space for highlights
- Lightly sketching edges of light areas
- Creating Depth with Shadows and Midtones
- A. Interplay between shadow shapes and midtones
- Minimizing the use of outlines
- Natural boundaries created by light and dark
Let's get started! If you want to draw realistically, you need to transition from line drawing to shading your artwork. The objective is to place lighter shapes next to darker shapes instead of simply outlining the subject.
When an object is illuminated from one side, it will have a light side and a shadow side.
To practice realistic drawing, start with a simple object, such as a pear, and light it from one side. Observe that the pear has a light side, a shadow side, and a cast shadow. Your task is to sketch the overall shape of the object first. Then lightly sketch the shadow side, followed by the cast shadow.
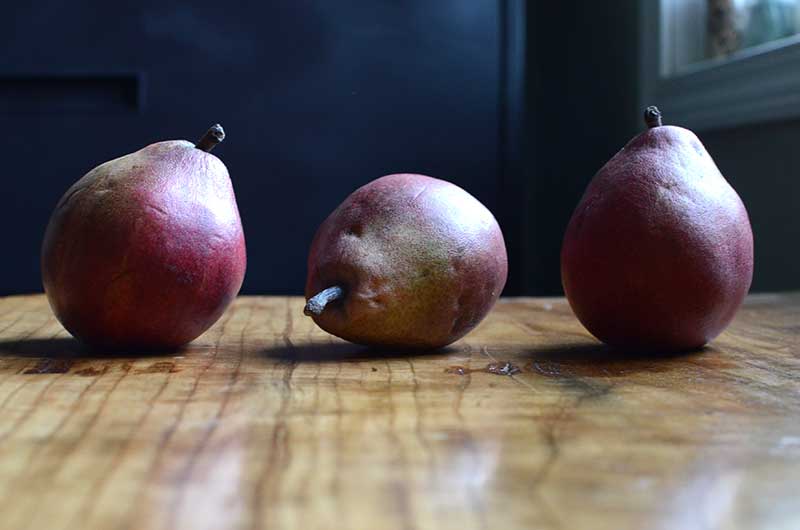
Setting up a still life of pears.
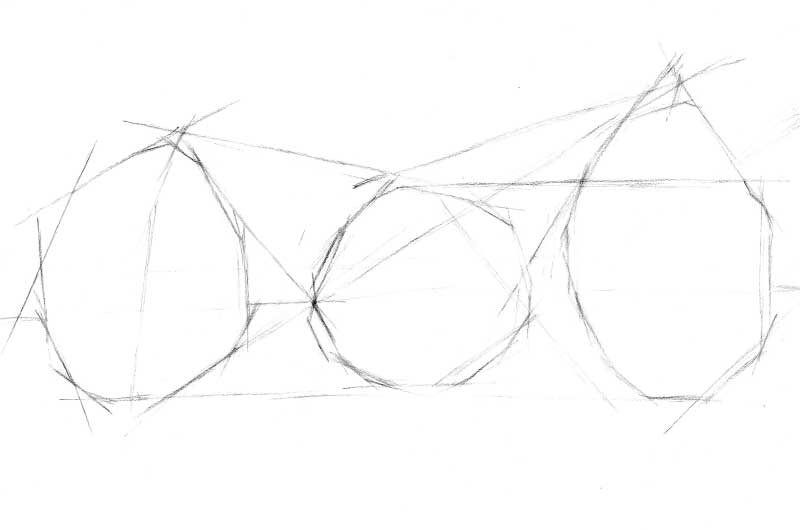
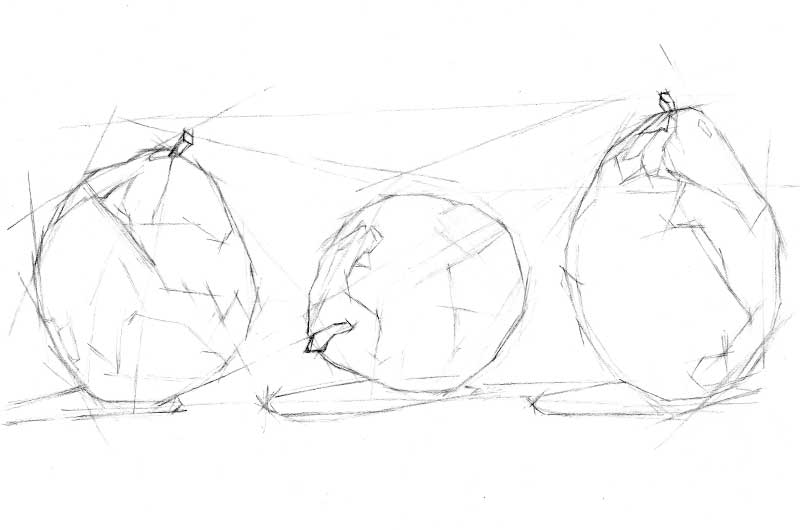
Beginning to sketch still life of pears.
Drawing the shadow shapes.
I like to refer to shadow areas as "shadow shapes." These shadow shapes are the areas that are darkened or shaded. While simple objects may have just one shadow side, complex objects may exhibit a variety of shadow shapes. The shadows can be intricate, containing shadow shapes within other shadow shapes. Depending on the texture and overall form, some areas of the shadow side may be darker or lighter than others, creating a gradient effect that shifts from light to dark. The key is to replicate what you see.
Draw slowly. Fixate on the area you are about to draw. Relax your eye. Relax your gaze. Focus longer on what you see to notice more details.
I recommend gazing at the object for 13 seconds. Count each second, relax your eyes, and keep your gaze steady without jumping around. You’ll start noticing details as you count from 1 to 13. Then, draw what you observe and repeat the process.
The easiest way to replicate what you see is to accurately copy the shadow shapes. The longer you observe, the more information will become apparent.
Pay attention to the shadow shapes, as the paper typically serves as the light area. By leaving the paper untouched, its color remains the lightest value. Lightly sketching the edge of the light area is often sufficient.
The interplay of shadow shapes and midtones creates depth and the illusion of form.
Remove outlines where possible. Most outlines should be minimized or integrated into a realistic drawing. For instance, when the light side of a face is adjacent to a darker background, the edge where light meets dark creates a natural boundary, making the outline unnecessary. Features should be defined through light and shadow rather than outlines.
Once the shadow shapes are established, lightly shade these areas. Shading can be achieved in various ways, from crosshatching to using charcoal. Start with light shading and gradually build up the shadows. Avoid shading too dark; overly dark contrasts against very light areas can make your drawing appear more like an illustration than realistic art. The aim is realism. After filling in the shadow shapes, gently blend the midtones, which are the medium values where light meets shadow. Soften the edges where light transitions to shadow.
You may notice a small amount of reflected light, which bounces off nearby objects or the surface. Reflected light is often quite subtle, so take care not to make these highlights too bright.
If a shadow has a sharp edge, create a sharp edge. Conversely, if a shadow has a soft, muted edge, blend and soften it. The goal is to draw what you see.
Conclusion
Shading a drawing relies on drawing what you see. I hope that you'll find these methods and suggestions helpful when shading a drawing.
I'm rooting for you!